Quickstart: Write a smart contract in Rust using Stylus
Stylus is currently tagged as an alpha release. The code has not been audited, and should not be used in production scenarios. This documentation is currently in public preview.
To provide feedback, click the Request an update button at the top of this document, join the Arbitrum Discord, or reach out to our team directly by completing this form.
Prerequisites
Rust toolchain
Follow the instructions on Rust Lang’s installation page to get a full Rust toolchain installed on your system. Make sure after installation that you have access to the programs rustup, rustc, and cargo from your preferred command line terminal (programs should be added to your system’s PATH, more instructions available on Rust’s website)
VS Code
We recommend VSCode as the IDE of choice for developing Stylus contracts for its excellent Rust support. See code.visualstudio.com to install. Feel free to use another text editor or IDE if you’re comfortable with those.
Some helpful VSCode extensions for Rust development:
- rust-analyzer: Provides advanced features like smart code completion and on-the-fly error checks.
- Error Lens: Immediately highlights errors and warnings in the code.
- Even Better TOML: Improves syntax highlighting and other features for TOML files, often used in Rust projects.
- crates: Helps manage Rust crate versions directly from the editor.
Setting Up a Developer Wallet
When working on a testnet, it's important to use a separate wallet that holds no real assets. This is because you'll often need to input private keys into your command line to manage transactions, and you should never use personal accounts for development purposes. So avoid using personal accounts for development.
If you're using MetaMask, here’s how to set up a new account:
- Open MetaMask and click the dropdown menu at the top middle of the plugin.
- Select “Add Account” to create a new wallet. Consider naming it something like "dev wallet" or "Stylus" to remind you of its purpose.
- You'll need the private key of this new account—and some testnet ETH (like Sepolia ETH) if you plan to deploy smart contracts. To get your private key, follow the steps provided on MetaMask’s support page.
This setup ensures that your real assets are safe while you develop and test on Arbitrum.
Never share your “secret recovery phrase” with anyone. Never enter it anywhere. A private key is valid for an individual account only, but a secret recovery phrase can be used to gain access to ALL accounts in your wallet.
To interact with the Stylus testnet, you need to manually configure two specific networks in your MetaMask plugin. Here’s how to set them up:
- Arbitrum Sepolia:
- Network Name: Arbitrum Sepolia
- New RPC URL:
https://sepolia-rollup.arbitrum.io/rpc - Chain ID: 421614
- Currency Symbol: ETH
- Block Explorer URL:
https://sepolia.arbiscan.io
After filling in these details, click "Save" to add the Arbitrum Sepolia network.
- Arbitrum Stylus Testnet:
- Network Name: Stylus testnet
- New RPC URL:
https://stylus-testnet.arbitrum.io/rpc - Chain ID: 23011913
- Currency Symbol: ETH
- Block Explorer URL:
https://stylus-testnet-explorer.arbitrum.io/
Click "Save" once you input all the details to add the Stylus testnet.
Acquiring and Bridging Testnet ETH
To engage with the Stylus testnet, you will first need to acquire Sepolia ETH and then bridge it over:
- Visit a faucet such as Bware Labs' Arbitrum Stylus Testnet faucet.
- Enter your wallet address.
- Click
Claimto receive your testnet ETH. Some faucets may offer additional steps to get more tokens.
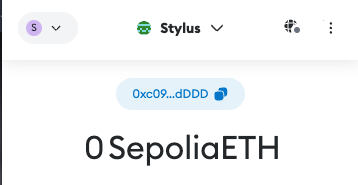
After these steps, you should see Sepolia ETH in your Sepolia testnet wallet.
Alternative faucets:
Next, bridge the Sepolia ETH to the Stylus Testnet:
- Go to the Arbitrum Bridge.
- Choose Arbitrum Sepolia as the source and Stylus Testnet as the destination.
- Connect your wallet and authorize the bridge to access your tokens.
- Specify the amount of Sepolia ETH you want to bridge and initiate the transfer by clicking
Move funds to Stylus Testnet. Make sure to keep some ETH in the source chain to cover transaction fees.
To verify the transfer, you can track the transaction on the [Arbiscan block explorer]((https://sepolia.arbiscan.io/) for the source and the Stylus testnet block explorer for the destination.
Your First Stylus Program
cargo-stylus is a command-line tool that simplifies the process of building, verifying, and deploying Arbitrum Stylus programs written in Rust. It functions as a plugin to Cargo, the standard build tool for Rust, allowing seamless integration into existing Rust workflows.
Installation
Ensure that Rust is installed on your system. You can install it from the Rust installation page.
Next, install the cargo-stylus tool by executing the following command in your terminal:
RUSTFLAGS="-C link-args=-rdynamic" cargo install --force cargo-stylus
To prepare your Rust environment for building WebAssembly (WASM) modules, add WASM as a build target with this command:
rustup target add wasm32-unknown-unknown
After installation, cargo-stylus is accessible through the cargo command. To view the available options and commands, use:
cargo stylus --help
This will display the following usage options:
Cargo command for developing Arbitrum Stylus projects

Usage: cargo stylus <COMMAND>

Commands:
  new         Create a new Rust project
  export-abi  Export a Solidity ABI
  check       Check that a contract can be activated onchain
  deploy      Deploy a stylus contract
  replay      Replay a transaction in gdb
  trace       Trace a transaction
  help        Print this message or the help of the given subcommand(s)

Options:
  -h, --help     Print help
  -V, --version  Print version
Creating a new Stylus project
The cargo stylus command comes with useful commands such as new, check and deploy, and export-abi for developing and deploying Stylus programs to Arbitrum chains. Here's a common workflow:
Start a new Stylus project with
cargo stylus new <YOUR_PROJECT_NAME>
This command clones a local copy of the stylus-hello-world repository, which contains a Rust implementation of the Solidity Counter smart contract example. For further details, refer to the README in the stylus-hello-world repository.
For a simpler setup, especially suitable for projects that do not require the full capabilities of Solidity, you can create a minimal project structure using:
cargo stylus new --minimal <YOUR_PROJECT_NAME>
This creates a project with just the essential Stylus entrypoint locally.
Continue to develop your Rust program using the features provided in the [stylus-sdk].
Checking Program Validity
Before deploying your program onchain, ensure its it works:
cargo stylus check
This command verifies that your program can be deployed and activated onchain without a transaction, by connecting to a specified JSON-RPC endpoint. The defalt endpoint is the Arbitrum Stylus testnet: https://stylus-testnet.arbitrum.io/rpc.
For additional options, consult the help guide:
cargo stylus check --help
A successful validation will display something like:
Finished `release` profile [optimized] target(s) in 0.20s

Reading WASM file at [YOUR-DIRECTORY]/target/wasm32-unknown-unknown/release/deps/stylus_hello_world.wasm
Uncompressed WASM size: 25.0 KB
Compressed WASM size to be deployed onchain: 9.0 KB
Connecting to Stylus RPC endpoint: https://stylus-testnet.arbitrum.io/rpc
Program succeeded Stylus onchain activation checks with Stylus version: 1
If the check fails, the output provides detailed error information, such as:
Reading WASM file at bad-export.wat
Compressed WASM size: 55 B
Stylus checks failed: program predeployment check failed when checking against
ARB_WASM_ADDRESS 0x0000…0071: (code: -32000, message: program activation failed: failed to parse program)

Caused by:
    binary exports reserved symbol stylus_ink_left

Location:
    prover/src/binary.rs:493:9, data: None)
For guidelines on what constitutes a valid or invalid WASM program, refer to VALID_WASM.
Deploying Your Program
Once validated, you can deploy your program using the cargo stylus deploy subcommand. Start by estimating the gas required for deployment. --private-key-path is a text file containing your private key. You could also use the --private-key flag to input your private key directly but this is not recommended for security reasons.
cargo stylus deploy \
  --private-key-path=<PRIVKEY_FILE_PATH> \
  --estimate-gas-only
The output might look like this:
Compressed WASM size: 3 KB
Deploying program to address 0x457b1ba688e9854bdbed2f473f7510c476a3da09
Estimated gas: 12756792
To proceed with the deployment, two transactions will be sent onchain:
cargo stylus deploy \
  --private-key-path=<PRIVKEY_FILE_PATH>
You'll see details about the deployment process, such as:
Compressed WASM size: 3 KB
Deploying program to address 0x457b1ba688e9854bdbed2f473f7510c476a3da09
Estimated gas: 12756792
Submitting tx...
Confirmed tx 0x42db…7311, gas used 11657164
Activating program at address 0x457b1ba688e9854bdbed2f473f7510c476a3da09
Estimated gas: 14251759
Submitting tx...
Confirmed tx 0x0bdb…3307, gas used 14204908
For further deployment options and transaction details, consult cargo stylus deploy --help.
Deploying Non-Rust WASM Projects
The Stylus CLI tool supports deploying WebAssembly (WASM) projects, including those not compiled from Rust. You can deploy any WASM file by using the --wasm-file-path flag with Stylus CLI commands.
Supporting Various WASM Sources
The tool isn't limited to Rust-compiled WASMs. It can deploy WASM files written in other programming languages like C, or even WebAssembly Text (WAT) files. This flexibility allows for deploying standalone WASM files that do not require Rust compilation.
For instance, a simple WAT module like this:
(module
    (type $t0 (func (param i32) (result i32)))
    (func $add_one (export "add_one") (type $t0) (param $p0 i32) (result i32)
        get_local $p0
        i32.const 1
        i32.add))
can be saved as add.wat. You can then check or deploy it using commands like:
cargo stylus check --wasm-file-path=add.wat
and
cargo stylus deploy --priv-key-path=<YOUR PRIV KEY FILE PATH> --wasm-file-path=add.wat
Exporting Solidity ABIs from Rust Projects
If you're working with Stylus Rust projects that utilize the stylus-sdk, you also have the option to export Solidity ABIs. This can be done easily using the export-abi command provided by the Stylus CLI tool:
cargo stylus export-abi
This feature supports seamless integration of Rust-based smart contracts with other Ethereum tools and frameworks, which often rely on Solidity ABIs to interact with various contracts.